SUBJECTS
GRADE
Show Results
Beautiful Oops
Lesson Summary
- Read the book Beautiful Oops and discuss ways to respond to mistakes in art.
- Learn about lines, shapes, detail, and oil pastel techniques.
- Create an artwork in response to a mistake.
Lesson Plan and Procedure
Lesson Key Facts
- Grade(s): K, 1, 2, 3, 4, 5, 6
- Subject(s): Health, Math, Visual Arts
- Duration of lesson: Two sessions, 45 minutes each
- Author(s): Rachel Gonthier
Day One
Lines
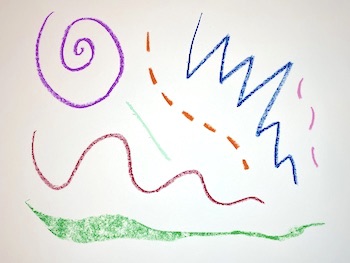 As a class, talk about lines. Explain that lines can be straight, diagonal, curvy, zig-zag, spiral, dotted, thick and thin. Have students stand up and make those different lines with their bodies.
On a piece of paper, demonstrate how to draw different kinds of lines with oil pastels. Explain that oil pastels are like crayons but that they are softer and break easier. Give students a scratch piece of paper and time to experiment with oil pastels by making different kinds of marks.
Shapes
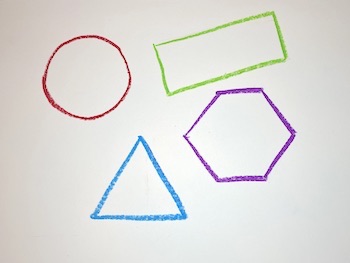 When students are finished drawing, talk about shapes. Explain that shapes are made when lines come around and connect with themselves. Have students stand up and make a line with their arms. Then have them connect the line by touching their fingertips together. Have them try to make circles, triangles, or other shapes with their body.
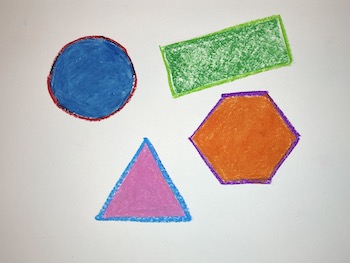
Demonstrate how to draw shapes with oil pastels on a piece of paper. Include circles, squares, rectangles, triangles, and hexagons, identifying the shapes together as a class while drawing them. Explain that these shapes are called geometric shapes and that most geometric shapes have straight lines, perfectly curved lines, or are usually measured out very carefully.
Describe that organic lines are different because they are irregular. Show some examples. Give students a second piece of scratch paper and have them draw geometric and organic shapes on their paper. Make sure they draw at least one geometric shape and one organic shape.
Coloring with Oil Pastels
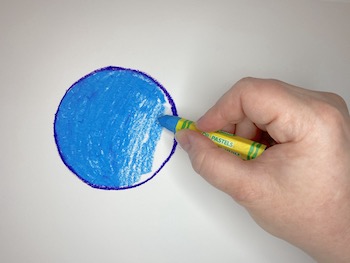
Demonstrate how to color inside the shapes with oil pastels. Encourage students to fill in any white spaces in order to make a solid color.
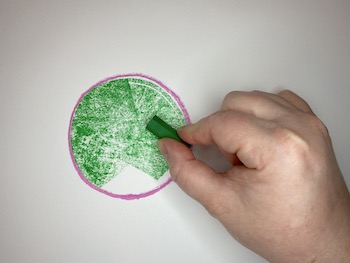
Show how to color large areas of paper by holding a broken piece of oil pastel on its side and rubbing it back and forth.
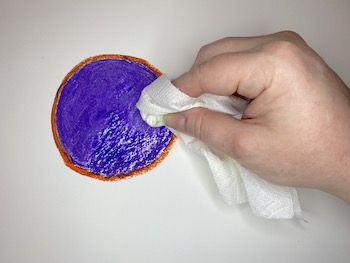
Demonstrate how to smooth out the texture by using a paper towel.
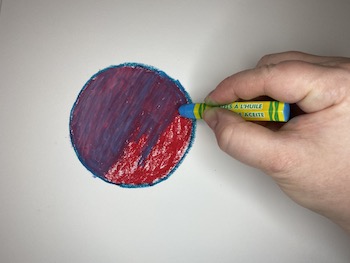
Show students how to layer different colors of oil pastels on top of each other.
The oil pastels themselves often become dirty with layers of other colors. Teach students how to clean the oil pastels by drawing on a paper towel to remove the unwanted color.
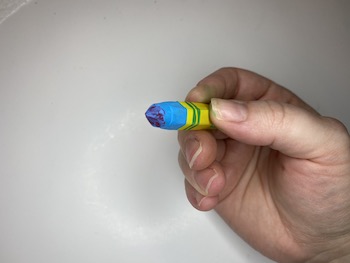
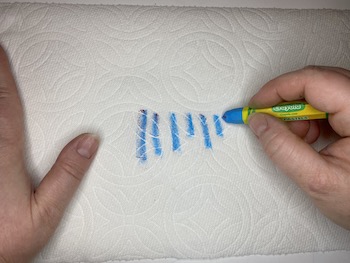
Have students practice these various coloring techniques by coloring in the shapes that they drew. Make sure they try all of the techniques on their paper.
Day Two
Preparation Needed
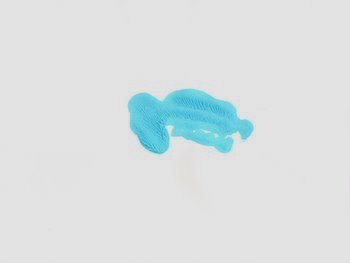
Make paint spots and smudges on drawing paper. Make sure there is at least one piece of paper per student. Allow time to dry.
 Teacher: Have you ever messed up on an art project before? How do you feel when you make mistakes? It is normal to feel frustrated or disappointed when we mess up, but it is so important to not give up because there are so many wonderful things that can happen when we work with our mistakes in a creative way. This book shows examples of different mistakes that happen in art. Pay attention to what the artist did to fix each mistake.
Read the book Beautiful Oops! by Barney Saltzberg to the class.
Optional Activity: Have a puppet talk to the class about how they are sad because they made a lot of mistakes while painting.
Puppet: I was painting and I accidentally dripped some paint onto my paper where I didn’t want it. I tried again on another paper and I messed up again, and again, again! Now I have a bunch papers with drips and smudges all over them! I want to give up and throw all of my paintings away!
Teacher: Now wait a minute, you don’t have to throw these away. We just read a book about turning mistakes into something beautiful. Class, would you like to make art out of these mistakes and show our friend how we can turn an “oops” into something better?
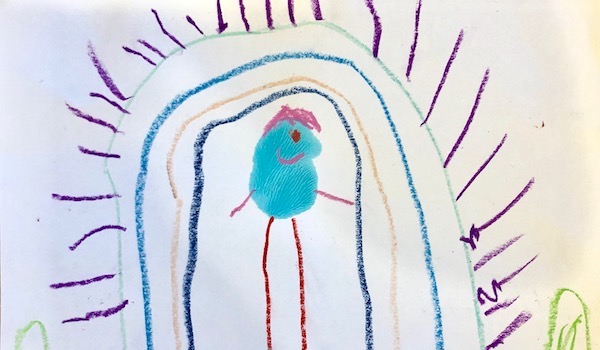
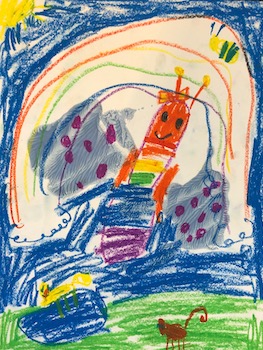
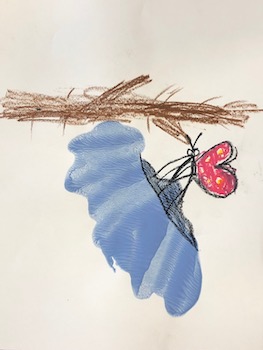
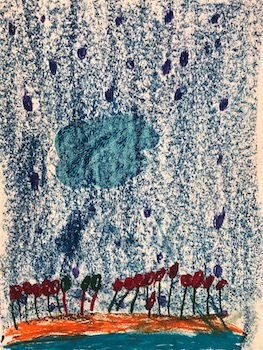
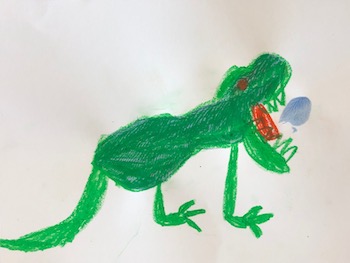 Show the class one of the paint-smeared papers. Invite students to use their imagination and find familiar shapes or forms. Call on students to share with the class what kind of potential they see in the shape. Make sure a variety of ideas have been shared before moving on.
Choose one of the ideas and demonstrate to the class how oil pastels can be used to add to the shape and expand it into something new. Emphasize the importance of adding as many details as possible to their artwork. Talk about the space around the paint blot and the importance of using all of the space on the paper.
Hand out oil pastels and paint-smeared papers to students and have them create their own artwork.
Reflection
At the end of class, spread out all of the completed artwork so that the whole class can view them. Have students take turns explaining their work by pointing out where the original “oops” was and how they made it into something beautiful. If you used a puppet at the beginning, you can have the students show their artwork to the puppet and explain what they did. Kids love this! If your class is short on time, you can have the students divide into small groups and take turns talking about their “oops” and what they did to change it. At the end, ask students to think about the following questions.
- Did you add lots of detail to your work?
- What kinds of coloring techniques did you use?
- How was your coloring? Did you fill in the white spots or did you scribble? Did you take your time? Was it your best work?
- What kinds of lines and shapes did you make in your art? Were any of your shapes organic or geometric?
- What did you learn about making mistakes? How can this help you in other situations?
Extensions
- Fast finishers can make art responding to torn paper, scraps of paper, holes in paper, bent paper, and/or crinkled paper.
- Blow drops of watercolor paint with a straw and have students creatively respond to the stain once it has dried.
- Read The Dot by Peter H. Reynolds and have students start by drawing two-dimensional circles and transform their circles to something new. See video. Then encourage the making of artwork by elaborating on 3-Dimensional spheres by using clay or other materials.
- Read books that address responding to mistakes or other problems: see list of books in Additional Resources.
Learning Objectives
- Engage in self-directed exploration and imaginative play with art materials.
- Create an artwork in response to an artistic problem.
- Create shapes using oil pastels including squares, circles, triangles, rectangles, and hexagons.
- Students will identify emotions associated with making mistakes and how to appropriately react to those emotions.
Utah State Board of Education Standards
This lesson can be used to meet standards in many grades and subject areas. We will highlight one grade’s standards to give an example of application.
Kindergarten Visual Arts
- Standard K.V.CR.1: Engage in self-directed exploration and imaginative play with art materials, and engage collaboratively in creative art-making in response to an artistic problem.
Kindergarten Mathematics
- Standard K.G.5: Model and create shapes from components such as sticks and clay balls.
Kindergarten Health Education
- Strand 2: Mental and Emotional Health Students will identify emotions and how to appropriately react to different emotions.
Equipment and Materials Needed
- Saltzberg, Barney. Beautiful Oops! New York: Workman, 2010.
- Oil pastels
- Drawing paper (80 lb sulphite paper recommended)
- Tempera paint
Additional Resources
- YouTube reading of Beautiful Oops!
- The Book of Mistakes by Corrina Luyken
- A Perfectly Messed-up Story by Patrick McDonnell
- The Girl Who Never Made Mistakes by Mark Pett and Gary Rubinstein
- What Do You Do With a Problem? by Kobi Yamada
- The Dot by Peter H. Reynolds
- Mistakes That Worked by Charlotte Foltz Jones
- It’s Okay to Make Mistakes by Todd Parr
- The Most Magnificent Thing by Ashley Spires
- Embrace the Shake Ted Talk by Phil Hansen
- Ish by Peter H. Reynolds
- It Looked Like Spilt Milk by Charles G. Shaw
Image References
Images 1-15: Rachel Gonthier

www.education.byu.edu/arts/lessons
 Download