SUBJECTS
GRADE
Show Results
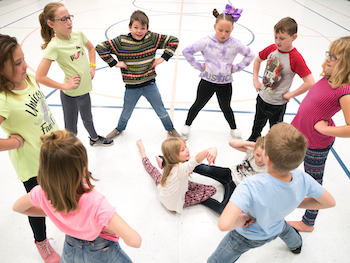
Geometry in Motion
Lesson Summary
- Understand basic geometric terms by creating shapes and exploring movement.
- Demonstrate their understanding of these terms by choreographing dances.
Lesson Plan and Procedure
Lesson Key Facts
- Grade(s): 3
- Subject(s): Dance, Math
- Duration of lesson: 45-60 minutes
- Author(s): Jana Shumway
 Download
Note: Place visuals and definitions of each geometric term on the wall before class begins.
Experience/Identify/Explore/Investigate
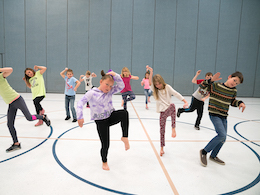
Activity 1: Exploring geometric terms
| Geometric Terms | Movement Instructions |
|---|---|
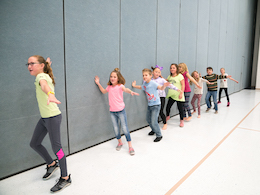
| Line | Slide with arms out to the sides along an imaginary straight line on the floor. Keep sliding even when you get to a wall or an object. |
| Point | Spin in place. |
| Line segment with end points | Spin in place, slide a straight line, and spin in place. |
| Ray | Spin in place. Slide a straight line and keep sliding even when you get to a wall or an object. |
| Parallel lines | Dance two arms that stay parallel. Dance two legs that stay parallel. Find a partner and slide pathways while staying parallel to that partner. |
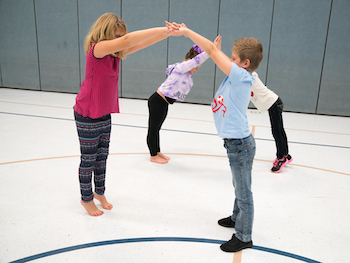
| Intersection | Create many shapes with intersecting lines using arms, legs, torsos, or a partner. |
| Vertex | Make shapes of vertices by using different body parts as the vertex. Remember that a vertex is the corner of an angle. Examples: “Make a shape where the vertex is your armpit.” “Make a shape where the vertex is your neck.” “Make a shape where the vertex is your knee”—or elbow or hip. |
| Angle | Create an angle with your body as one ray and your arm as another ray. Create another angle using both legs as the joining rays. Try other angles like obtuse, acute, and right by using either the body, a leg, or an arm. Then try creating more angles using specific vertices. Examples: “Make a shape of an obtuse angle with your neck being the vertex.” “Make a shape of an acute angle with the vertex being your knee.” Next try making angles with a partner. Examples: “With your partner, make an acute angle with your elbows being the vertex.” “With your partner make an obtuse angle with your two heads being the vertex.” |
Activity 2: Perimeter and Area
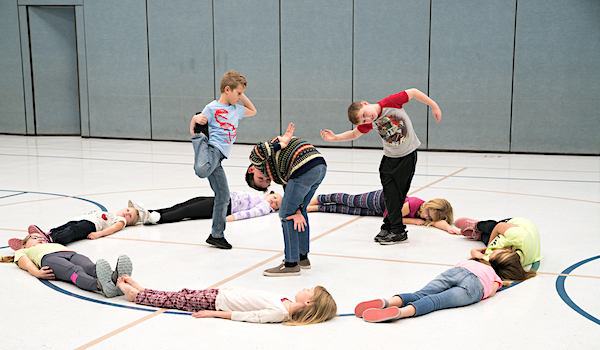
In a gym, use the painted lines on the floor. Find a circle and have all the students slide on it going the same direction. Point out that the line creating the circle is the perimeter. Have the students make a shape on the perimeter. Next, direct them to make a connecting shape on the perimeter by connecting foot to foot, elbow to elbow, or hand to shoulder. Have the girls go inside the area and dance while the boys hold their shape on the perimeter. The girls can skip, slide, jump, leap, twirl. Switch and have the boys dance in the area while the girls hold a shape on the perimeter. Find other lines on the gym floor and go to different perimeters and areas doing a variety of movements and shapes.
 In the classroom, divide the students into two groups. Have group A make the perimeter of a circle by holding hands. Group B can dance in the area. Then group B can make the perimeter of a circle by connecting their feet, knees, or elbows. Group A can dance in the area.
Have each group now separate and design three different creative perimeters of a circle. One perimeter of a circle might be created by lying down, one might face backward, or one might be formed by connecting heads. If there’s time, try creating perimeters of other shapes.
Activity 3: Polygons
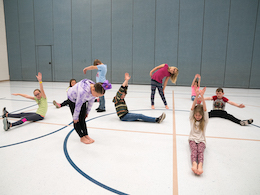
A polygon shape is made with three or more line segments that are closed with no curves. Have the students create polygons with small elastics. Students can create polygons by stretching their elastics with their hands, feet, behind their knees, on top of their heads, behind their backs, or by lying down. Next, have the students try making pentagons, hexagons, and octagons. Reinforce the definition of polygons while the students are creating their shapes.
Note: Small elastics can be made using one-inch elastic that is sewn together at the ends. Make the circle big enough to go from your chin to the floor while standing.
Activity 4: Quadrilaterals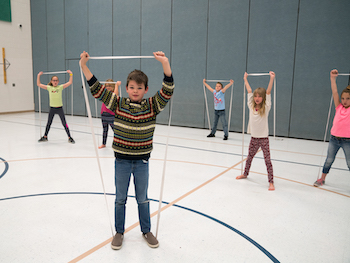
Have the students create squares, rectangles, parallelograms, trapezoids, and rhombuses with small elastics. If large elastics are available, have students create polygons and quadrilaterals in small groups.
Create/Perform
Divide the students into small groups to create mini geometry dances by following the guidelines below. They could create just one or two of the four ideas, or they could piece together four mini-dances into one long dance. Decide what is best for your class.
Guidelines for Mini Geometry Dances
Idea 1: Line—point—line segment—ray—parallel lines.
Have the students refer back to the movement done earlier in class regarding line, point, line segment, ray, and parallel lines. This time, however, tell the students to decide how to dance these terms as a group.
Teacher: Will you all go the same direction or will you go different directions? Do you want to put in a cannon or do you want the timing to be the same? What formations will you use? Do you like diagonal lines, circles, or scattered formations?
Idea 2: Make three creative perimeters.
In small groups, have the students create three different perimeters. They can use their heads, legs, and elbows, or they can lie down, turn backward, or do combinations of any of the ideas. They can choose to create the perimeter of a circle, parallelogram, rhombus, or trapezoid. They can also decide if they want to add dancers in the area of their perimeters. Finally, have them decide how they will transit from one perimeter to the next.
Idea 3: Create geometric shapes.
In small groups, have the students choose three of the shapes listed below. Have them stretch their elastics into the shapes and transit from one shape to the next with an energy quality (explode, sustain, vibrate, swing, sway, or collapse). For example, the students can start by stretching their elastics into the shape of a rhombus, then move sustained into the shape of an octagon. They can explode into a trapezoid and end by collapsing into a pentagon.
- Parallelogram: four sides and two sets of parallel lines
- Trapezoid: four sides and two parallel lines
- Rhombus: four sides that are equal in length
- Pentagon: five sides and five vertices
- Hexagon: six sides and six vertices
- Octagon: eight sides and eight vertices
Idea 4: Make four really interesting polygons (do not use elastics—only use self).
In small groups, have the students create interesting polygons just using their bodies. Remember that the lines must be straight, they cannot intersect, and the shape must be closed. The students can use their arms, legs, or whole bodies, or they can lie down, sit down, kneel down, or stand up. Each person in the group must be connected to the person on each side. Have them choose one locomotor step and an interesting floor pattern to transit from one polygon to the next. Each polygon should be in a different location.
Have the students choose their favorite mini-dance and perform it for the rest of the class. Allow the audience to discuss what geometric shapes and terms they saw in each dance.
Connect/Analyze
Review the geometric terms from the lesson. Have the students look around and connect the terms to what they see in the classroom. They can also create a visual art project that includes the same geometric terms and shapes.
Learning Objectives
- Identify shapes in different categories that may have similar characteristics.
- Review basic geography terms such as line segment, parallel lines, vertex, and angle.
- Experiment with a variety of stimuli for movement.
- Create a dance phrase with others that communicates an idea.
Utah State Board of Education Standards
This lesson can be used to meet standards in many grades and subject areas. We will highlight one grade’s standards to give an example of application.
Grade 3 Math
- Standard 3.MP.4: Model with mathematics. Identify the mathematical elements of a situation and create a mathematical model that shows the relationships among them. Identify important quantities in a contextual situation, use mathematical models to show the relationships of those quantities, analyze the relationships, and draw conclusions. Models may be verbal, contextual, visual, symbolic, or physical.
- Standard 3.MD.8: Solve real-world and mathematical problems involving perimeters of polygons, including finding the perimeter given the side lengths; finding an unknown side length; and exhibiting rectangles with the same perimeter and different areas or with the same area and different perimeters.
- Standard 3.G.1: Understand that shapes in different categories (for example, rhombuses, rectangles, and others) may share attributes (for example, having four sides), and that the shared attributes can define a larger category (for example, quadrilaterals). Recognize rhombuses, rectangles, and squares as examples of quadrilaterals, and draw examples of quadrilaterals that do not belong to any of these subcategories.
Grade 3 Dance
- Standard 3.D.CR.2: Experiment with a variety of self-identified stimuli for movement and explore a given movement problem by improvising, selecting, and demonstrating possible solutions.
- Standard 3.D.CR.3: Improvise and create a dance phrase, alone or with others, that expresses and communicates an idea or feeling.
- Standard 3.D.P.3: Replicate body shapes, movement characteristics, and movement patterns with self-awareness and body control.
Equipment and Materials Needed
- Drum
- Small elastics for individual student use
- Large elastics for group activity
- Music tracks for background music:
- “Drive Away (End Title)” by Thomas Newman
- “Ijeilu” by James Asher
- “Optical Race” by Tangerine Dream
- “Sun of Jamaica” by Cusco
- Images of the following:
- Line
- Point
- Line segment
- Ray
- Parallel lines
- Intersection
- Vertex
- Angle
- Perimeter/Area
- Polygons
- Quadrilateral: squares, rectangles, parallelograms, trapezoids, rhombuses
- Pentagon
Additional Resources
Image References
Images 1–7: James Huston.
www.education.byu.edu/arts/lessons