SUBJECTS
GRADE
Show Results
Place Value Pointillism
Lesson Summary
- Create pointillistic fish using paint and recycled lids.
- Work collectively to determine how to display fish in a mural.
- Create word-problem questions.
Lesson Plan and Procedure
Lesson Key Facts
- Grade(s): K, 1, 2
- Subject(s): Math, Visual Arts
- Duration of lesson: Three sessions, 30-45 minutes each
- Author(s): Lisa Garner
 Download
Session 1: Exploring Pointillism
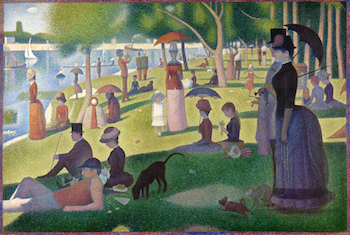
Show students the image A Sunday Afternoon on the Island of La Grande Jatte by Georges Seurat and discuss.
Teacher: What kinds of things do you see in the first painting? Where could they be? They are on an island where people go to relax and do recreational things like boating. What would it be like to be there on the island? How might you feel? What would you like to do there?
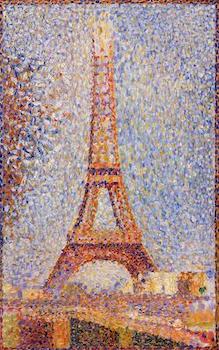 Next, show them an image of The Eiffel Tower by the same artist.
Offer students a way to look closely at the images. Either zoom in on the images, have prints available for the students, or allow the students to move up closer to examine the details.
Teacher: This is artwork done by a famous artist named Georges Seurat. He is famous because he started a style of painting that was very different and unique at the time. What do you see when you look at his paintings up close? That’s right: little dots of paint. He made each part of the painting by using tiny dots of paint, carefully placed close together. When our eyes view the dots all at once, our minds blur the dots together to see shapes and lines as a whole. Today, images on computers are made the same way, but instead of using dots of paint, they have tiny squares of light called “pixels.” There were other artists who painted with dots, too. This style of painting is now called “pointillism.” Today many people still imitate artists like Georges Seurat, while others use pointillism in different creative ways.
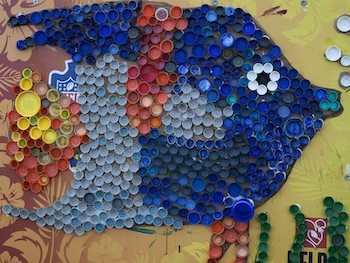 Show the students some ways in which people use pointillism, including pictures and murals utilizing bottle caps. Explain to students what a mural is. (See links in the “Equipment and Materials Needed” section.)
Teacher: Today we will begin creating our own version of pointillism using watercolor and recycled bottle caps. We will make these into fish that we can place together in a mural for others to enjoy. We will also use the mural to do math problems.
Show an example of a completed fish made prior to the lesson.
Teacher: This is a fish I made by doing a watercolor wash, and when it dried, I glued on colored lids. Let’s count the lids. There are 10 lids or scales on the fish. As you create your own fish, you also need to use exactly 10 lids. You will make a fish today using either warm or cool colors for the scales, or lids. Warm colors are reds, yellows, and oranges. Cool colors are blues, greens, and purples. Which color scheme did I use on my fish?
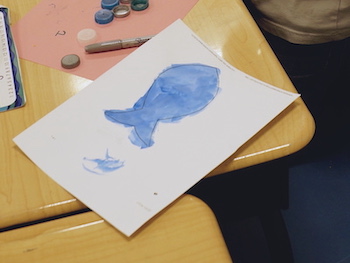
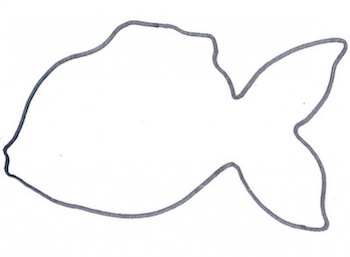 Have students choose whether they would like to use warm or cool colors. Hand out the fish templates printed on cardstock. It is best to have a variety of sizes. Demonstrate how to use watercolors to paint the fish template. Encourage students to cover the whole fish with color.
Here are a few watercolor basics to discuss with beginning painters.
Use water to activate the colors or “wake them up.”
- The more water you use, the lighter the colors become. Minimal water keeps the colors more vibrant.
- Most watercolor paints don’t include the color white. In order to get white on your paper, you have to leave parts of it blank.
- Use the paper towel to pat out excess water on your brush.
- Move the paintbrush in gentle strokes. Don’t smash the bristles in all directions.
- Wash off the brush before dipping in a new color. Otherwise, you will make the other colors dirty.
- Don’t overwork the same spot on your paper. If you brush over it too many times, it will tear away at the paper.
- When cleaning brushes, shape the bristles straight and make sure the brush dries on its side or upright in a cup. Never leave the bristles face down in a cup.
While the paintings are drying, have students select 10 plastic lids and use permanent makers to color the inside of them. To collect lids before the lesson, place boxes in the cafeteria for people to donate lids. Or, ask parents to save lids and send them with the students to class. All colors and sizes of lids are acceptable for this project.
Kindergarten Adaptation:
To make the art medium easier for kindergarteners, use bingo markers, dot markers, or Q-tips and tempura paint, instead of bottlecaps.
Session 2: Finishing the Fish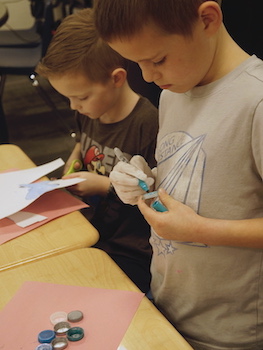
Have students cut out their fish and carefully place the lids on. They should have 10 lids total. Students should then take their fish to an adult to get help gluing the bottle caps to the cardstock.
Session 3: Designing a Mural
Teacher: Let’s review who did this artwork and what the method is called. We had fun recycling plastic lids to make scales on the fish. How many scales are allowed on the fish? How did we decide the colors for the fish? (By warm or cool colors).
Prompt students to make connections between their own artwork and the work of Georges Seurat and others who use pointillism.
Teacher: Why would people today have thought of using bottle caps to make pointillism artwork instead of painting the exact same way that George Seurat did?
Possible answers:
- Because using paint has been tried many times
- Because we are trying to recycle and make less trash in our landfills
- Because it’s easy to use everyday objects
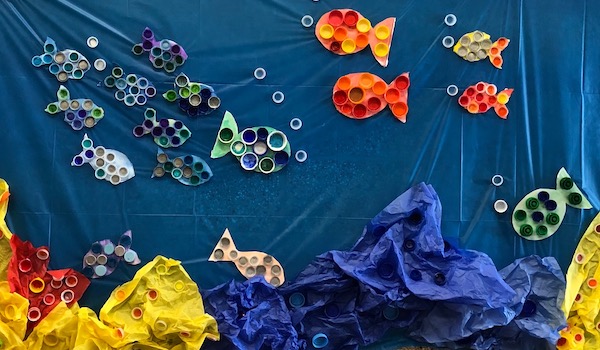
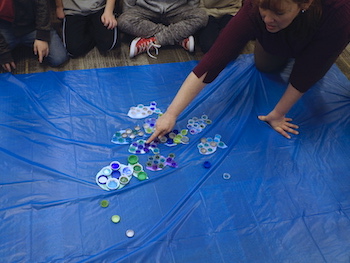
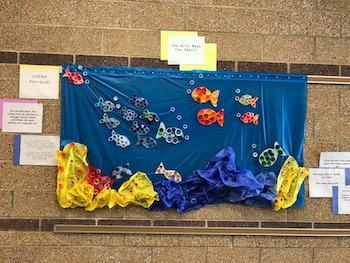
Teacher: For our math today, we will use our fish and place them on the paper to make them look like they are swimming. We will make a mural. We know that many fish swim in groups, called schools. How can we arrange the fish to look like they would under the sea?
Have students work collaboratively to place and arrange the fish on the plastic table cloth or butcher paper.
Guide students with the following questions:
- Do we want to put the fish in groups?
- Do we want some fish swimming alone?
- Do you want to group them by color or size?
- How can we make the mural look balanced?
- How would it look if we squished all of the fish into one corner or placed all the fish at the bottom or the top?
- What level do we want the fish swimming at? Do we want some fish swimming high and others swimming low?
- In what direction do we want the fish to swim? Do we want them swimming in the same direction or in different directions?
 Teacher: Each of these fish represents the tens place value because they are in groups of 10. How could we show the ones place value using bottle caps? (E.g., bubbles, parts of kelp or coral.)
Have students place single bottle caps around the mural to represent bubbles or other parts of the ocean.
To complete the mural, use scrunched tissue paper and other bottle caps to create kelp, bubbles, or coral.
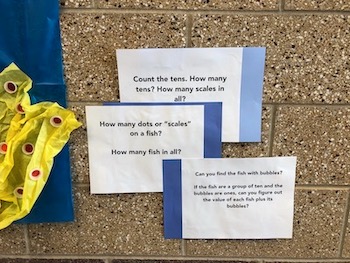
Teacher: If we were going to count how many tens and ones are in the mural, how would we begin? Let’s count the fish first, and then the bubbles. What is the total? Now I will send you to your seats. I want you to come up with at least one math problem or question that could be answered by looking at this mural. Tell your table partner your question.
Teacher: I want you and your table partner to write down your question (on the paper or whiteboard). We will have you share the questions with the class when you are done.
Give the students about five to seven minutes to write their questions.
Possible Questions: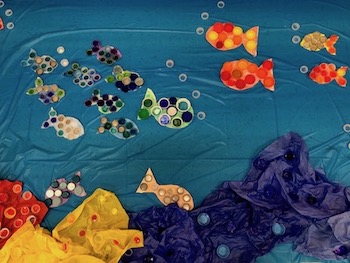
- How many fish in all?
- How many tens?
- How many ones?
- How many lids in all?
- How many lids are on the warm-colored fish?
- How many lids are on the cool-colored fish?
- How many small lids?
- How many big lids?
Kindergarten Adaptation:
Have students create their own individual picture, rather than a class mural. They can watercolor-wash individual cardstock backgrounds to create an ocean scene. Students can paint their fish to represent 10 and then add more dots with bubbles or coral to represent the ones. Students should only use between one and nine additional dots outside of the fish on their individual pictures. This allows students to count dots in smaller amounts, like teen numbers instead of larger numbers.
Learning Objectives
- Collaborate with others to create a mural.
- Explore the use of recycled materials and watercolor paint to create works of art.
- Explain why some art materials are preferred or valued over others.
- Describe a work of art that illustrates daily life experiences.
- Understand that the two digits of a two-digit number represent amounts of tens and ones.
- Create a visual model with mathematics, and use it to identify quantities, analyze relationships, and draw conclusions.
- Recognize and apply the structures of mathematics, such as patterns and place value.
Utah State Board of Education Standards
This lesson can be used to meet standards in many grades and subject areas. We will highlight one grade’s standards to give an example of application.
Grade 1 Visual Arts
- Standard 1.V.CR.1: Engage collaboratively in exploration and imaginative play with art materials, and use observation and investigation in preparation for making a work of art.
- Standard 1.V.CR.2: Explore the use of materials and tools to create works of art or design; use art materials, tools, and equipment in a safe way; and identify and classify uses of everyday objects through drawings, diagrams, sculptures, or other visual means.
- Standard 1.V.P.1: Explain why some objects, artifacts, and artworks are valued over others.
- Standard 1.V.R.1: Select and describe works of art that illustrate daily life experiences of one’s self and others, and compare images that represent the same subject.
Grade 1 Mathematics
- Standard 1.MP.4: Model with mathematics. Identify the mathematical elements of a situation and create a mathematical model that shows the relationships among them. Identify important quantities in a contextual situation, use mathematical models to show the relationships of those quantities, analyze the relationships, and draw conclusions. Models may be verbal, contextual, visual, symbolic, or physical.
- Standard 1.MP.7: Look for and make use of structure. Recognize and apply the structures of mathematics such as patterns, place value, the properties of operations, or the flexibility of numbers. See complicated things as single objects or as being composed of several objects.
- Standard 1.NBT.2: Understand that the two digits of a two-digit number represent amounts of tens and ones. Understand the following as special cases:
- 10 can be thought of as a bundle of ten ones, called a "ten."
- The numbers from 11 to 19 are composed of a ten and one, two, three, four, five, six, seven, eight, or nine ones.
- The numbers 10, 20, 30, 40, 50, 60, 70, 80, 90 refer to one, two, three, four, five, six, seven, eight, or nine tens (and 0 ones).
Equipment and Materials Needed
- Image of A Sunday Afternoon on the Island of La Grand Jatte by Georges Seurat
- Image of Tour Eiffel by Georges Seurat
- Other images of modern-day versions of pointillism
- Images of bottle cap pointillism art
- Completed bottle-cap fish to show as an example
- Various fish patterns on cardstock or watercolor paper (make sure that the patterns selected only fit 10 bottle lids, no more and no less): Pattern 1 and Pattern 2
- Watercolor paint
- Paintbrushes
- Water cups
- Paper towels
- Scissors
- Butcher paper or plastic table cloth (if using with kindergarteners, have cardstock for students to use as individual backgrounds instead)
- Hot-glue gun
- Recycled lids, bingo markers, or Q-tips and tempura paint
- Colored permanent markers
- Colored tissue paper
- Either blank paper or personal whiteboards, dry-erase markers, and erasers
Additional Resources
- This lesson is part of a unit using the arts to teach place value. The lessons can be found on the BYU ARTS Partnership website. The titles include the following:
Image References
Image 1: Lisa Garner.
Image 2: Seurat, G. (1884-1886) A Sunday Afternoon on the Island of La Grand Jatte. https://commons.wikimedia.org/wiki/File:A_Sunday_on_La_Grande_Jatte,_Georges_Seurat,_1884.png
Image 3: Seurat, G. (1889) Tour Eiffel. https://commons.wikimedia.org/wiki/File:Georges_Seurat_-_Tour_Eiffel.jpg
Image 4: Eco-friendly art, Lance Cpl. Matthew Bragg. https://www.alamy.com/stock-photo-marine-corps-base-hawaii-a-piece-of-artwork-is-made-of-recycled-bottle-129720597.html
Images 5: Lisa Garner.
Images 6–8: Emily Soderborg.
Images 9–11: Lisa Garner.

www.education.byu.edu/arts/lessons