SUBJECTS
GRADE
Show Results
The Science of Ancient Art
Lesson Summary
- Learn the science and anthropology of ochre, a mineral used to create natural paint.
- Experiment with mixing ochre paints to determine what materials make the very best paint.
- Paint with ochre on different surfaces (rock, paper, wood).
Lesson Plan and Procedure
Lesson Key Facts
- Grade(s): 2, 4, 5, 6
- Subject(s): Science, Social Studies, Visual Arts
- Duration of lesson: 1 Hour
- Author(s): Elizabeth Hora, Amy Boehme, formatting by Yvette Ward May
 Download
This lesson came about from a collaboration with the Utah State Historic Preservation Office and the BYU ARTS Partnership.
The Science of Ancient Art
This lesson draws from studies in science and social studies to learn about how people have created paints from natural materials.
In this lesson students will learn the science and anthropology of ochre, and then will get to mix their own ochre paints as they experiment to determine what materials make the very best ochre paints.
Lesson:
Slideshow: The Science of Ancient Art
Be familiar with lesson vocabulary. Vocabulary words to know are in italics in the slideshow.
Slides 1 & 2: Introduction
Slides 3, 4, & 5: What is ochre?
Slides 6, 7, & 8: How people use ochre...
Class Discussion Questions/ Learning Assessment:
- What colors of ochre are there? (Reds, browns, yellows, even purples.)
- How do you think people all over the world discovered how to use ochre?
- What are some of the ways that different cultures and people have used ochre? (Paints, hair and body paint, painting caves and other rock surfaces.)
- How do you think ancient rock artists used their art to contribute to their communities?
- How do these ochre arts convey meaning for the observer as well as the creator?
- How can historians look at ancient ochre art to interpret historical events?
- There are ancient pictographs made with ochre created by people living in Utah. Knowing that, how have our communities changed or remained the same over time? What makes you think that? Why?
- Do you think that it takes a long time to make ochre into a paint?
Teacher: Let’s learn more.
Slide 9: How do you get ochre ready to use?
Slide 10: Powdered ochre pigment
Slide 11: Paint components: pigment, carrier, binding agent, emulsifier
Slide 12: Experimentation
Teacher: Possible questions for discussion:
- What are some of the techniques people use to make ochre? (Grinding/milling, levigating, drying)
- What might have motivated ancient artists to keep experimenting in creating ochre paint?
- How would you use ochre paint if you had some?
Teacher: Today, you will mix your own ochre paints and evaluate the effectiveness of two different binding agents, assessing how well each paint mixture works.
Mixing Ochre Activity
Before you begin this activity, prepare and set-up all student supplies (see equipment and materials list below)
Note: This ochre will clean up with soap and water. If some gets onto skin or clothing, wash with cold water and regular detergent.
Step one: Prepare the honey paint
- Have your students pour out a tablespoon (or other small amount) of ochre into a cup. Optionally, you can have cups set out already with a measured amount of ochre in them.
- Next, ask your students to slowly and carefully pour water into their ochre to make a paste. This is your carrier substance. You will look for a consistency similar to tempera or acrylic paint.
- Once the desired consistency is achieved, pour in up to one half tablespoon of honey. This is your binding agent.
- Mix.
Step two: Prepare the animal fat paint
- Have your students pour out a tablespoon (or other small amount) of ochre into a cup. Optionally, you can have cups set out already with a measured amount of ochre in them.
- Next, ask your students to slowly and carefully pour water into their ochre to make a paste. This is your carrier substance. You will look for a consistency similar to paint.
- Once the desired consistency is achieved, have your students pour in a pea-to dime-sized amount of animal fat. This is your binding agent.
Ask your students to mix the water and fat.
- What happens? Is it mixing? Why or why not?
- How does this mixture look compared to the honey mixture?
- Would this make good paint?
The oil-based animal fat will not mix with the water/ochre mixture — it will look lumpy and not at all like paint. This is because oil and water do not mix! An emulsifier is needed.
Have your students add several drops of dish soap, then mix. Ask your students:
- What happened to their paint?
You can explain that an emulsifier for oil and water is a chemical that can bind together an oil and water. The ochre is chemically mixed together now.
Step Three: Painting
- Distribute the materials your class will paint — whether it be a stone, or a thick paper, or some other material.
- Let your students paint whatever they want, however they want.
- Sharing paints with neighbors is encouraged! This step is all about free experimentation.
Variations
- Have your students mix together different colored ochres and paints to see what colors they can make.
- Have your students mix together different binders and emulsifiers. Does that make the paint better, in their opinion?
Reflections: Class Discussion
Teacher:
- Does ochre make a good paint? Why or why not?
- What binders worked the best? Why?
- Which mixture was easier to work with, smoother, more vibrant, etc.? Why do you think that?
- If you used different painting surface materials (rocks, wood, paper), what surface worked the best for painting? Why?
- How can people show stewardship through responsible use, conservation, protection, and replenishment or natural minerals like ochre?
- What will you remember about this art experience?
- What did you like most about your own creative process, or your peer’s artworks?
Learning Objectives
- Identify what ochre is, in basic terms.
- Understand that natural materials with certain properties are well-suited for specific uses
- Plan and carry out an investigation to classify different kinds of materials. based on patterns in their observable properties.
- Construct an explanation showing how the properties of materials influence their intended use and function.
- Understand the depth and breadth of ochre used around the world and throughout time.
- Generate artistic work by conceptualizing, organizing, and completing and artistic ideas.
- Understand, evaluate, and articulate how works of art convey meaning for the observer as well as the creator.
- Brainstorm multiple approaches to an art or design problem, and make art or design with various materials and tools to explore personal interests, questions, and curiosity.
- Experiment with various materials and tools to explore personal interest in a work of art or design.
- Demonstrate safe procedures for using and cleaning art tools, equipment, and studio spaces.
- Repurpose objects to make something new.
- Discuss and reflect with peers about choices made in creating artwork.
- Relate artistic skills, ideas, and work with personal meaning and external context.
- Create works of art about events in home, school, or community life.
- Compare and contrast cultural uses of artwork from different times and places.
- Identify how our community has changed or remained the same over time, and make inferences about the reasons why.
- Understand different ways our natural environment helps meet human needs of living, working, and playing.
- Identify natural resources (ochre), and cite ways people show steward-ship through responsible use, conservation, protection, and replenishment.
Utah State Board of Education Standards
This lesson can be used to meet standards in many grades and subject areas. We will highlight one grade’s standards to give an example of application.
SEEd: Grade 2
Strand 2.3: PROPERTIES OF MATTER: All things are made of matter, which exists with different forms and properties. Matter can be described and classified by its observable properties. Materials with certain properties are well-suited for specific uses. Heating or cooling some types of matter may or may not irreversibly change their properties.
Standard 2.3.1: Plan and carry out an investigation to classify different kinds of materials based on patterns in their observable properties. Examples could include sorting materials based on similar properties such as strength, color, flexibility, hardness, texture, or whether the materials are solids or liquids. (PS1.A)
Standard 2.3.2: Construct an explanation showing how the properties of materials influence their intended use and function. Examples could include using wood as a building material because it is lightweight and strong or the use of concrete, steel, or cotton due to their unique properties. (PS1.A)
Visual Arts Grade 2
Strand: CREATE (2.V.CR.): Students will generate artistic work by conceptualizing, organizing, and completing their artistic ideas. They will refine original work through persistence, reflection and evaluation
Standard 2.V.CR.1: Brainstorm multiple approaches to an art or design problem, and make art or design with various materials and tools to explore personal interests, questions, and curiosity.
Standard 2.V.CR.2: Experiment with various materials and tools to explore personal interest in a work of art or design.
Standard 2.V.CR.3: Demonstrate safe procedures for using and cleaning art tools, equipment, and studio spaces.
Standard 2.V.CR.4: Repurpose objects to make something new.
Standard 2.V.CR.5: Discuss and reflect with peers about choices made in creating artwork.
Strand: PRESENT (2.V.P.): Students will analyze, interpret, refine, and select artistic work for presentation. They will convey meaning in the manner in which the art is presented
Standard 2.V.P.3: Analyze how art exhibited inside and outside of schools (such as in historical sites) contributes to communities.
Strand: RESPOND (2.V.R.): Students will understand, evaluate, and articulate how works of art convey meaning for the observer as well as the creator
Standard 2.V.R.1: Perceive and describe aesthetic characteristics of one's natural world and constructed environments, and categorize images based on expressive properties.
Standard 2.V.R.2: Identify the mood suggested by a work of art and describe relevant subject matter and characteristics of form.
Standard 2.V.R.3: Use learned art vocabulary to express preferences about artwork.
Strand: CONNECT (2.V.CO.): Students will relate artistic skills, ideas, and work with personal meaning and external context.
Standard 2.V.CO.1: Create works of art about events in home, school, or community life.
Standard 2.V.CO.2: Compare and contrast cultural uses of artwork from different times and places.
Social Studies Grade 2
History: compelling question: Why do historians look at multiple primary sources to interpret historical events?
Standard 2.1.2: Use primary sources (ancient ochre arts) to identify how their community has changed or remained the same over time, and make inferences about the reasons why.
Geography: compelling question: What are different ways our natural environment helps meet human needs of living, working, and playing?
Standard 2.2.6: Identify natural resources (ochre), and cite ways people show stewardship through responsible use, conservation, protection, and replenishment.
Equipment and Materials Needed
- Upload slideshow: The Science of Ancient Art
- Per Student You Will Need:
- One half tablespoon of ochre powder (one half tablespoon per color if you are using multiple colors)
- Two disposable cups (per color)
- Two paintbrushes (per color)
- Up to three tablespoons of water (per color)
- Coffee stirrers, or some other stirring tool
- One half teaspoon honey
- One half teaspoon beef tallow (or other rendered animal fat)
- Three drops dishwashing soap
- One or more rocks or heavy-duty construction paper for painting
- Water and towels for clean up
- Optional: Smocks, tablecloths, pipettes (These give a fun science feel and allow the students to have greater control over how much water and soap they are using.)
- Become familiar with the lesson vocabulary
- Option: Instead of using the slides #3-9, print these 3 pdf readings, one per student, to teach the content.
- What is Ochre? This one-page reading introduces students to the chemical composition of ochre and where it forms naturally.
- How Do People Use Ochre? A two-page reading that offers a brief anthropological tour of how people use ochre around the world, and even throughout time.
- How Do You Get Ochre Ready to Use? A three-page reading that explores the physical science of preparing ochre for use as a paint.
Additional Resources
Image References
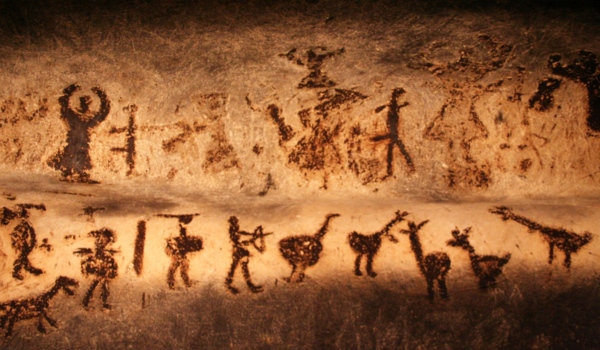
Image 1: CC https://upload.wikimedia.org/wikipedia/commons/a/a3/Magura-cave-pictographs.jpg (Magura Cave, Danube Trail, Bulgaria)
Image 2: https://ushpo.utah.gov/
www.education.byu.edu/arts/lessons