SUBJECTS
GRADE
Show Results
Traditions that Connect: Ute Bear Dance

Lesson Summary
- Learn about the White Mesa Community Bear Dance tradition.
- Paint or embroider on a photo.
- Connect past to present and present to future.
Lesson Plan and Procedure
Lesson Key Facts
- Grade(s): K, 1, 2, 3, 4, 5, 6
- Subject(s): English Language Arts, Social Studies, Visual Arts, Native American, Tribe Approved
- Duration of lesson: Varies
- Author(s): Jack Cantsee, Jr., Wanda Ketchum, Karilee Park, and Emily Soderborg
 Download
The Ute Mountain Ute’s Tribal Council selected this lesson content in answer to the question, “What would you like the students of Utah to know about you?” Griselda Rogers, the Ute Mountain Ute Education Director, and Aldean Ketchum, Ute knowledge keeper, represented the Ute Mountain Ute Tribe in crafting the lesson to provide expertise, accuracy, and authenticity. The lesson was then approved by the Ute Mountain Ute’s Tribal Council.
Before teaching this lesson, please explain to your students that there are many Indigenous tribes in the United States and that this lesson specifically focuses on the White Mesa Community of the Ute Mountain Ute Tribe and does not represent other Native American groups. It is the hope of the Ute Mountain Ute that other Native tribes will respect their choice to share these aspects of their history and culture.
Note to Teacher: You do not need to know how to embroider to do this art project with your students.
This project uses objects, photos, or images of objects from your students’ pasts (possible heirlooms). Please send the following letter to parents before so that students do NOT bring something precious from home for the project.
Dear Parents,
On (insert date here) we will be making a project tying our past to our present and our present to our future. We would like students to bring three COPIES of one of the following on cardstock paper:
- A photo of a relative
- A family recipe
- A story about a relative
- A photo of a family heirloom
- Words to a poem or song that is important to your family
- Something that has been passed down (such as a tradition, story, etc.)
This is a great opportunity to share ancestral stories and traditions that your child may not be familiar with. We will be turning these images into an art project (poking holes, sewing, coloring, etc.), so we want to stress that students do NOT bring originals. Please have them bring multiple copies (at least three) so that students can start again if they mess up without stress. This should be something meaningful that ties to the student in some way.
Thank you so much!
*Note: The following lesson walk through is for the embroidery slideshow. Please find a link for printable slide prompts for the painting slideshow below under materials.
Slide 1: Title Page
Slide 2-3: Tradition
Teacher: What is a tradition?
Write some ideas on the board—they don’t have to be “right.” They are just ideas.
Teacher: Here is one tradition from a community in Utah. Jack Cantsee, Jr. (pictured in the middle in the dark red/brown shirt on slide 2) is a member of the White Mesa Community which is a part of the Ute Mountain Ute Tribe. He has been a Bear Dance Chief for many years. Listen/Watch to see what tradition he is sharing in this story.
Watch via slideshow on slide 3 or here for the longer version (6:24) or here for the shorter version (0:44).
Teacher: From the Bear Dance Chief, Jack Cantsee’s telling of the legend of the Bear Dance, what is tradition?
Write down more ideas on the board.
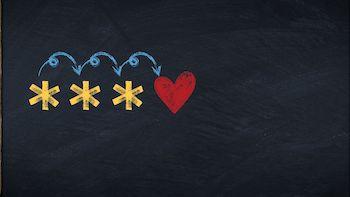
Then draw a shape on the board. Explain that this shape (circle, star, heart, hexagon—whatever shape you want) represents each of them in the present.
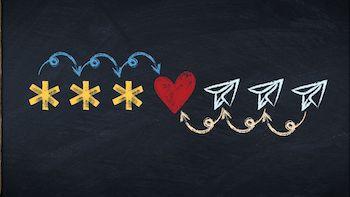
Draw three more shapes to the left, explaining that tradition connects us to the people of our past.
Draw three more shapes to the right and explain that as we continue traditions, we tie the present to the future.
Teacher: Briefly stated, a tradition is handing down information, beliefs, or customs from one generation to another. What are some family traditions that you have?
Slide 4: Maintaining Tradition
Teacher: The Ute Mountain Ute Bear Dance has many traditions connected with it. Each of the Ute bands from the three federally recognized Ute tribal nations has unique traditions and styles of food, music, dress, housing, celebrations, and ceremonies. Today, tribes struggle to maintain their traditions with changing times and external influences. To understand the culture of each Ute tribe means exploring the uniqueness that each individual tribe has to offer. Although there are many things each group of Ute people could add about the Bear Dance, we are focusing specifically on the White Mesa Community today.
The Bear Dance is the oldest dance recorded in North America. The Bear Dance legend and practice has changed over the past 600+ years, but it is still a connecting event that brings communities together. Dancers pass down their regalia (traditional dress) to their family and work together to prepare for the dance. The Bear Dance is done in the spring in most Ute communities, but in the White Mesa Community, instead of bringing the bear out of hibernation, their Bear Dance is done over Labor Day weekend as the last Bear Dance of the season to send positive energy with the bear, to calm its spirit, and get it ready for hibernation.
The traditions don’t just include the dance itself, but also preparing for the Bear Dance. Ute elders have shared, “It was the men who usually prepared the Bear Dance corral and any other functions connected with the Bear Dance. The women’s role was to prepare the family’s clothes that they were to wear during the dance. It was the role of the story teller to tell the family about the way of life and this was done in the winter time when the family was gathered together.” (https://www.southernute-nsn.gov/culture/bear-dance/)
To maintain traditions, the importance of ceremony and language must also be recognized. The Bear Dance is a social dance, but more importantly, it is a ceremony. Someone struggling can ask the singers and/or Bear Dance Chief to include a prayer through song and dancing that generates a good, healing feeling that is put out when the Bear Dancing happens.
The Bear Dance also has teaching within it that is passed to each generation. It teaches respect for the female. When a female chooses a male to dance, he can’t say no. It teaches the female the importance of knowing who she is related to because she can’t dance with a relative. There are also traditions shared in the symbolism of the Bear Dance that relate to the way the Utes live. The Bear Dance represents the circle of life–with everything done in order. In life, sometimes you fall, but, like in the dance, there are those around you who can help you get up and bless you to keep going. Even with that help, it is up to you if you stay down or if you get up, brush yourself off, and continue.
Slide 5-6: Wanda Ketchum
Teacher: Wanda Ketchum is married to another Bear Dance Chief, Aldean Ketchum. Even though she is Navajo and not Ute Mountain Ute, she has become an important part of the Bear Dance Community. Do you remember how the regalia, or traditional clothes, were an important part of preparing for the Bear Dance? Listen and see how Mrs. Ketchum uses a Bear Dance shawl to connect with traditions.
Show Wanda Ketchum’s video on slide 6 of the slideshow or here.
Teacher: How does Mrs. Ketchum use the shawl she was given to connect with her past, but also prepare something for her future?
You all brought copies of photos, recipes, poems, or a family story with you today: these images connect you with your past. To connect the past with present and the present to the future, we are going to add our own stories through the art of embroidery.
*Teacher note: for younger grades, or if you don’t feel comfortable having your students use needles, paint markers are great alternatives, and you can get some very fun and similar designs.

Slide 7: Han Cao
Teacher: Han Cao, a fiber artist, gives new life to old photographs through embroidery as she connects the past to the present.
Point out how some designs are a simple cross-stitch, or outlining, and some are much more complex. Students can embroider over existing details to leave their mark, or create their own details changing the copies they have into something completely new.
Slide 8: Connection Past-Present-Future
Remind students that what they are adding should help them think about and appreciate their past, but also think about how this will influence the people in their future.
Photo Embroidery Activity Instructions:
Slide 9: Step 1
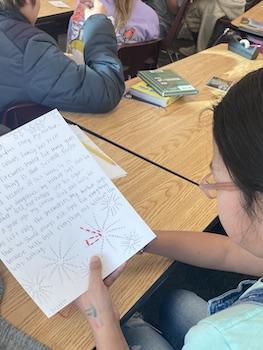
Step 1: With one of their copies, have them draw out their design. If they just want to create a grid, have them use a ruler and measure perpendicular lines. If a student has a cardstock copy of a photograph, they will want to use a ballpoint pen to draw their designs over the darker colors of the print. If their cardstock copy is word-based rather than picture-based, it is fine to use a pencil to create their designs.
Slide 10: Step 2
Step 2: Once their design is drawn, students will place their image on foam board and use a needle tool to punch holes into their design.
Establish your rules for using needles in class! Here are some suggestions:
- Always have guard on if not in use
- Always know where your needle is
- If you drop it, pick it up right away
- Do not point your needle at anyone or anything
- Keep the needle away from your face (or anyone else’s)
- Do not threaten or pretend to poke or stab anyone.
Breaking of rules can be a loss of participating in this project (perhaps have them create their designs with paint markers instead).
Note: Warn students to not punch holes too close together, as this will increase the chance of ripping the paper during embroidery.
Slide 11: Step 3
Step 3: When holes are punched, students are ready to start sewing.
Threading the needle tends to be the most difficult. Watch this video if you have access to needle threaders and this video or this video if you don’t.
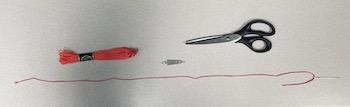
A good amount of thread is the length of your students’ forearm. The longer the thread, the more likely it is to get stuck in a knot while sewing. The shorter the thread, the more often they will have to rethread their needles.
Before you knot the floss, make sure that students are not doubling it. Have one tail that is short, and one long like this:
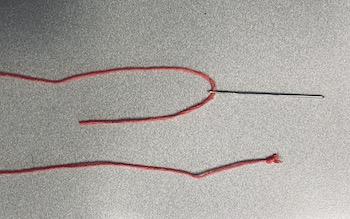
Students will start sewing from the back of their image. Have them secure their first knot with tape to keep it in place.
Warn students that pulling thread too tight will cause ripping in the paper or warping, and not pulling tight enough will create space and hanging thread.
*Note: Demonstrate threading and knotting by having them gather around, or if you have a document camera.
Creating Two Basic Line Types:
Slide 12: Dotted line
- A dotted line is created by taking the needle and thread up and down through every hole.

Slide 13: A continuous line
- A continuous line is created by putting the needle up through one hole, down the next, and up through the next (just like for a dotted line) then back down the previous hole.
Getting Creative:
Slide 14: 3-d Line
- Sew around ribbon or yarn to create a more three-dimensional line.
- Instead of following an outline, fill your designs by sewing to opposite holes.
Slide 15: Cross-stitch on a Grid
- Start in the back from one corner. Pull the thread up and down through the opposite corner. Push the needle through the hole just above the last corner, and pull through that opposite corner to create an X within the box. Repeat for every box of the grid.
Slide 16: Purpose
While students sew, walk around and ask about their designs and traditions. Ask the class why these things are important for their families. Explain that the continual practice of the Bear Dance for the White Mesa Community is to help their culture survive: they pass it down so it keeps going. What do students want to always remember and to pass down?
Teacher: Teaching the younger generation the songs, the instruments, how to make the regalia, and the knowledge the Bear Dance conveys is of extreme importance to the White Mesa Utes. Jack Cantsee, Jr., shares, “We want them to come to be involved. It will be through them that the Bear Dance continues. I remember singing when I was a little boy. I was there with my grandpa, dad, and uncles. I learned it as a child, and as a Bear Dance Chief, I’m now passing it on to the younger generations. These opportunities help them identify who they are.”
Slide 17: Artist Statement
When students finish, have them write an artist statement paragraph of how their art connects them to their past and their future. What do they want to share in order to preserve their traditions?
You can find another slideshow link for how to write an artist statement on the word share on slide 17 of this slideshow or by going to this link.

Slide 18: Preserving Traditions
Invite someone to read the slide.
Teacher: How can you pass down your traditions? Why is sharing/talking about them important?
Share and Display Finished Art:
As part of sharing their traditions, please display students' work along with their artist statements in the hall or in the classroom, or students can present their work in front of the class.
Learning Objectives
- Discuss how traditions keep communities alive
- Experiment with painting or embroidery on paper
- Make connections between traditions, stories, and self through artwork exploration
Utah State Board of Education Standards
This lesson can be used to meet standards in many grades and subject areas. We will highlight one grade’s standards to give an example of application.
Grade 3 English Language Arts
- Standard 3.SL.2: Speak clearly and audibly while asking and answering questions about a topic and key details presented in various media and formats.
- Standard 3.W.3: Write narrative pieces to develop real or imagined experiences or events using effective technique, descriptive details, event sequences, and provide a concluding statement.
- Set the scene and introduce a narrator and/or characters; organize an event sequence that unfolds naturally.
- Write, produce, and expand simple, compound, and complex sentences.
- Use dialogue and descriptions of actions, thoughts, and emotions.
- Use appropriate conventions when writing including text cohesion, sentence structure, and phrasing.
Grade 3 Fine Arts
- Standard 3.V.CR.2: Create a personally satisfying artwork using a variety of artistic processes and materials.
- Standard 3.V.CR.3: Demonstrate an understanding of the safe and proficient use of materials, tools, and equipment for a variety of artistic processes.
- Standard 3.V.C0.2: Recognize that responses to art change, depending on knowledge of the time and place in which it was made.
Grade 3 Social Studies
- Standard 3.2.3: Define their own cultures or the cultures of their communities (for example, art, music, food, dance, system of writing, architecture, government to which they are regularly exposed or of which they are part).
Equipment and Materials Needed
- Slideshows
- Printable Slide Prompts
- 7 Generation Video (if desired)
- Paint markers (if not embroidering) options below:
- Acrylic or Tempera paint from the bottle with q-tips, toothpicks, etc for creating designs
- plate or palette to hold color for dipping and shirt or aprons to protect against spills
- Ballpoint pens/pencils
- Needle Tools for poking holes of optimal size
- may use thin wooden skewers or toothpicks, etc.
- Thick Foam Blocks for poking holes all the way through the paper without rips or bending.
- may use something sturdy like a cardboard box
- Embroidery Needles
- Embroidery floss
- Yarn (optional)
- Ribbon (optional)
- Lace (optional)
- Tape
- Scissors
- Rulers
- Letter to home PDF
- 3 copies printed on cardstock of family image (such as a photograph, recipe, poem, story, etc) for each student
- For students unable to bring images from home, please have copies (3 for each student) printed on cardstock of images that they can use such as:
- Photo of the school
- Class photo
- Mantra
- Stock photo of the world
- A map of your neighborhood or state
- Students’ last name printed out in bold letters
- For students unable to bring images from home, please have copies (3 for each student) printed on cardstock of images that they can use such as:
Additional Resources
This lesson was created thanks to a grant from the National Endowment for the Arts and the Utah Division of Arts & Museums.
- Colorado Commission of Indian Affairs: Cultural Heritage Unit
This unit provides an in depth look at the cultural heritage of the Ute People. Students will explore the music and historic background of the Bear Dance in addition to a brief introduction to the ways in which the Ute People celebrate the seasons. Students will also study the art and music of the Ute People and how it is still part of Ute culture today. - We Shall Remain Curriculum: The Bear Dance as an Expression of Ute Culture
When using this lesson please remember that the intention of this lesson is to foster an understanding of Ute culture by considering the values and meanings expressed in the Bear Dance. You should not have your students perform an approximation of the Bear Dance as part of this lesson. The Bear Dance is a vital ceremony in the lives of Ute people and should never be performed without the permission of the Ute Tribe and guidance of Ute spiritual leaders. - Artful Teaching Podcast, Native American Series 3: Observing, Experiencing, and Researching the Bear Dance.
Image References
Image 1: Emily Soderborg
Images 2-4: Karilee Park
Images 5-8: Emily Soderborg
Images 9-10: Karilee Park
Images 11-14: Emily Soderborg
© Brigham Young University and the Ute Mountain Ute Tribe
www.education.byu.edu/arts/lessons